California art

IMG_6413

Yesterday I made this. I’ve wondered what to do with this awkward spot above the desk and next to the stairs for years. I even made a pallet project before this to fill it, but it ended up looking better somewhere else in the house. I thought I’d used up my pallet wood and tried to throw the rest of the pallet away in the trash but the garbage men wouldn’t take it! They took the wood pieces out of the trash can and put it on the sidewalk. Sooooo, I had to do something with the rest of the pieces of pallet wood. It was good wood too, just in weird, smallish pieces though. The wood had been well weathered – a process I had nothing to do with. I just let it sit in the side yard getting rained on, washed over with sprinklers and bleached out by the sun for years. Anyway, I wanted to do a little tutorial as to how I made it.

I don’t have a ton of pictures to share about the process, so I’ll have to explain it mostly. First off, I really used this website as a guideline and inspiration: http://www.manmadediy.com/users/david/posts/3456

1. I had a map of CA printed on a large engineer print at Staples for like $4. You can use my map, which is 2×3 feet, but I felt like it was too small and didn’t realize it until I got home with it and put it on the wall space. At that point, I just tried to freehand an enlargement of the map I had printed out. I don’t recommend that. But here it is:

california

If you want something bigger, here is a 3×4 foot map:

California5

2. Once you print out the map, cut it out.

3. Lay out all your pieces of pallet wood on the ground and situate it the way you like it. I had thick and thin pieces of pallet wood. Some were 4″ tall and some were 6″. Brush it all off and make sure it looks the way you want it and then place your cut out map on top of the wood. Once you see that it fits ….

4. Take your map off, flip all your wood over to the “wrong” side (or the side you want on back) and you will be working on the back side of your project from here on out. Flip your map over too now, so you’re looking at the back of the map and lay it on the wood pallets. Now trace it.

5. Take your paper map off the boards and get a piece of thin plywood (that’s what I used). Make sure your plywood is smaller than the map you drew. Cut it if you need to (I used my Skil saw for that).

6. Once your plywood is small enough to fit within the border of the map you drew, screw it into place. Make sure your screws are just long enough to go through the plywood and into the pallet boards without coming through the front side of the pallet boards.

IMG_6415_altered

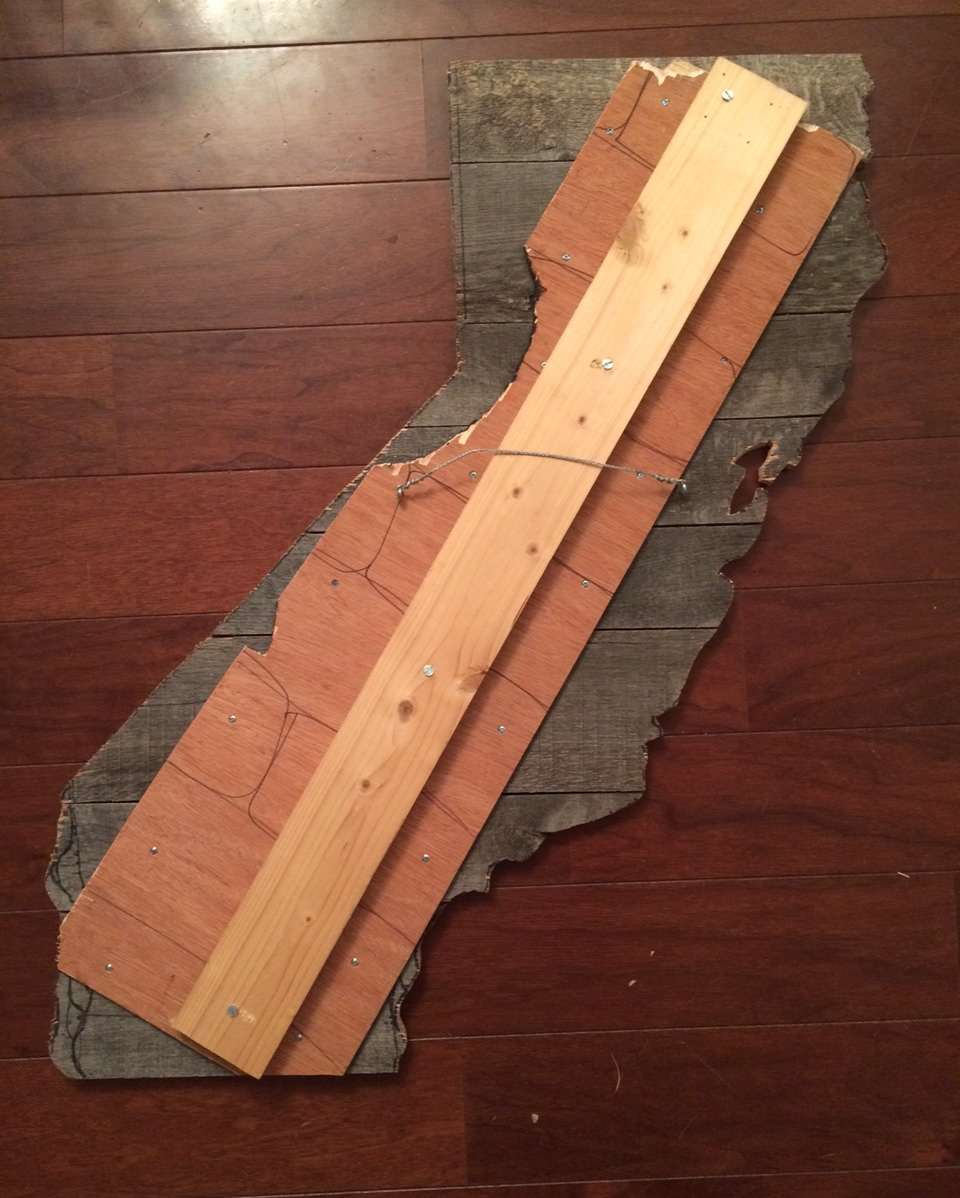
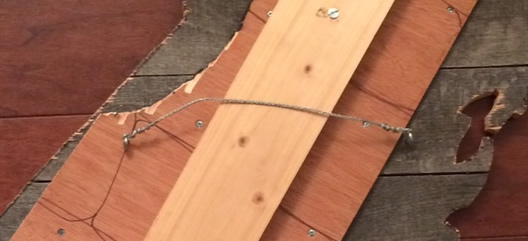
7. My plywood was pretty flimsy, so I used a 1×4 pinewood board to stabilize it. I just screwed that into the back also (see picture above – the picture above was taken at the end, after I had already cut everything out, but at this point in the steps, you haven’t cut out your map yet).

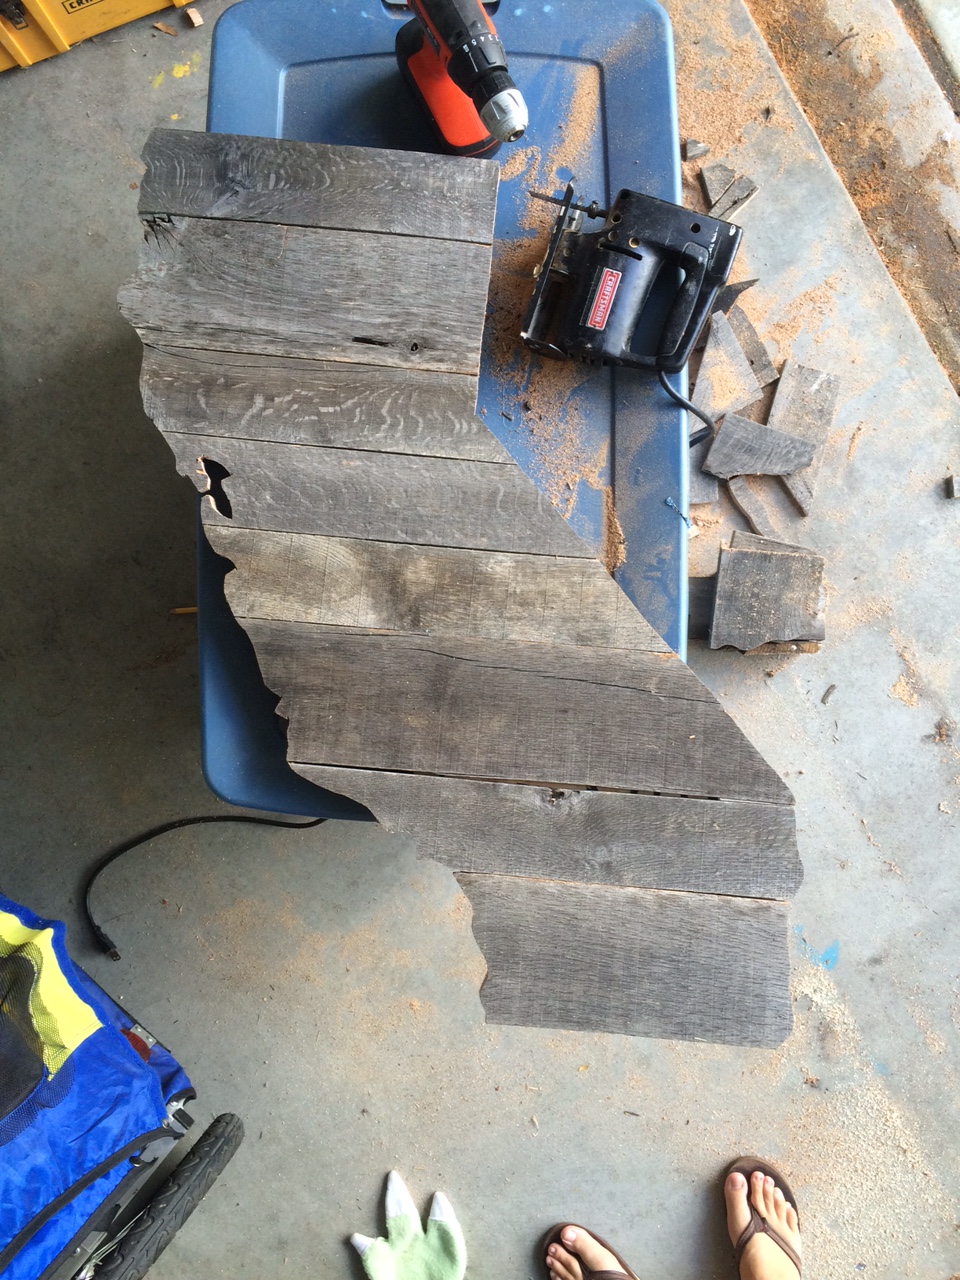
8. Now you cut out the traced map with a jigsaw. There are few tight turns on the CA border, especially the San Francisco bay area and I had to use my drill to make holes and then insert the jigsaw blade into those holes and keep cutting. I also cut it in sections. Sometimes I came at different portions from another angle. If you need to know how, I watched a few videos on YouTube about how to use a jigsaw. Very informative.

IMG_6407

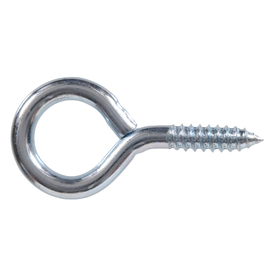
9. The pallet wood I used was pretty heavy, so to hang it, I used two hook eye screws and screwed them in at an even level, then wrapped a wire between them. Below is a picture of a hook eye screw:

008236592238lg

California is an awkward shape, so to make sure it hung correctly, I had to put the wire and hook eye screws pretty far down on the state, about halfway down, and not high at the top.

IMG_6415_back

10. And that’s it! You can sand it if you want (I didn’t) or stain it (I didn’t) or paint it (I didn’t), but don’t let that stop you. If I didn’t love the patina the wood I had, I would’ve stained it.

At the end, I freehand painted a gold heart over the Bay Area where I grew up.

IMG_6414

I really liked this project. It was pretty easy and problem free. It was meant to be rustic looking, so a few imperfections are desired. Fun project. There you go, make one yourself now!

Goals 2015

2015goals

This is how I chose to display our family goals this year. We each tried to pick something for a different area of our lives: spiritual goals, health goals, educational goals and a fun goal.

I used an old chalkboard I had in the garage (by chalkboard I mean a board I painted with chalkboard paint a few years ago). Then I printed out pictures of the goals we made to give us a visual image of what we’re working towards. Anyway, I printed it out on cardstock and stuck it to the board with tape. Goals? Done.

thankful tree

I have been meaning to do this for years and I finally got to it this year. Christina really got me going because she called me and said, “I know where you should put your thankful tree in your new house”. Awesome. Sooo, I kept looking online at thankful trees and they were pretty puny. Little gatherings of sticks in a vase …. but not me. I always go big. I took a wall and 3 days to really finish it.

Anyway, last night for Family Home Evening, we sat around our table and I cut out leaves from paper and the boys and Daniel wrote things they were grateful for. They really got into it. I HAD to stop them so we could eat treat and get to bed. It was fun and easy and I love that it looks like Fall inside my southern California house now :)


summer readiness

Yes, you have to prepare for summer. With my little boys, they thrive on schedules and routine. Whenever I leave things up to them or allow them to just wing it and do whatever they want, they just fight, get angry, watch more TV, whine, ask to play more video games …. in short – it’s a mess. So, I have spent the better part of the day and a little of yesterday gathering ideas and plans and making a summer chart.

The chart just has their daily tasks on there and then there will be things we do once a week. Those are the small squares. I will laminate the charts, then laminate the squares and use sticky tack to attach the squares on different days of the week, depending on the activities for the week. I also made a list (which will also be laminated) of physical activities for the boys to pick from. All of their daily tasks will be things they can do on their own, things they know how to do and where to go to do them, except for the physical activities, hence the idea list.

I’ve also compiled a summer reading log/chart and collected a TON of ideas for science and art experiments to do all summer on one of my pinterest boards here. I had to post this because …. I spent all day on it and I feel like I have nothing to really show for it, unless I show it to someone. So there. Summer fun, done. Got it covered :)

quotes

My Noah … he’s so beautiful right? There are a few quotes that the boys have said recently that have been floating around in my head. Gotta get them written down, here goes:

Noah – Can I have some more bread?

Me – No, you need to finish your soup first.

Noah – awwwwww. But I was going to use it wisely.

While we were at swim lessons last night, Liam looked over at his teacher in a swimsuit, who was getting some papers together before class started. She is not really skinny. And Liam said, “Mommy, look – she must not work out”.

I was talking to Noah after school a few days ago and was asking him about it. He was telling me about recess and this is what he said, “I was trying to play on the slider bar, but this third grader wasn’t playing with it fairly.”

I ask, “So what did you do?”

Noah – “Well, I had to try and work it out. But she didn’t want to work it out and just wanted to go on the slider 3 times in a row! That’s not playing fairly. So I had to go tell a teacher and the third grader had to say sorry for not playing fairly with the slider”.

Noah hears certain phrases and then uses them excessively during a story. It’s funny.

I’m kind of sick right now. Just a summer cold, but annoying and tiring. Our ward had a Relief Society meeting on organization and I couldn’t resist going. I came up with a few things I want to implement into my life, or maybe just new goals now. I’m excited, here they are:

1. The Kids’ Art – I have been putting the boys’ art in sheet protectors and in a 3 rig binder for years now. It’s not easy to access (top of their closet) and the boys never look at their art and some art papers are much bigger than the 8.5×11 sheet protectors I have, so this is what I’m going to do: take pictures of each piece of art and then create a picture book of their art and get it printed in a bound book. That way they can look at it and it takes up less space and any sized art piece will fit :)

2. Clean out under my bed and donate most of it.

3. Church Stuff – I am the Activity Days leader and every other week we have activity nights where I have to bring a bunch of stuff: a binder full of info, paper, stickers, office supplies, our rules and Articles of Faith boards, the articles of faith treasure box of treats thy earn when they memorize one, magazines …. the list goes on, but you can see what I mean. All that stuff has been haphazardly collecting into an old Macy’s bag in the corner of my room and slowly starting to creep into the center of my room. It has been driving me crazy. So! I got an idea of what to do: I got a clear plastic bin that I already had, bought an accordion file folder and got out my label maker. I put all the papers, stickers, binder and magazines in the accordion file folder with labels on each file. Then I put that and all the other items in the plastic bin (in an organized fashion). I am going to keep this box in the back of my car, so it won’t take up space in my house and will always be ready for activity days!

So, that’s what I’ve been working on and thinking about. Now I’ve got to get in the shower (going on day two sans shower) and get dressed so that when Daniel and the boys get home we can run errands as a family to IKEA. I love IKEA. Daniel hates it, but he’s going.